ESP8266 NodeMCU Web Server using LittleFS (Flash File System)
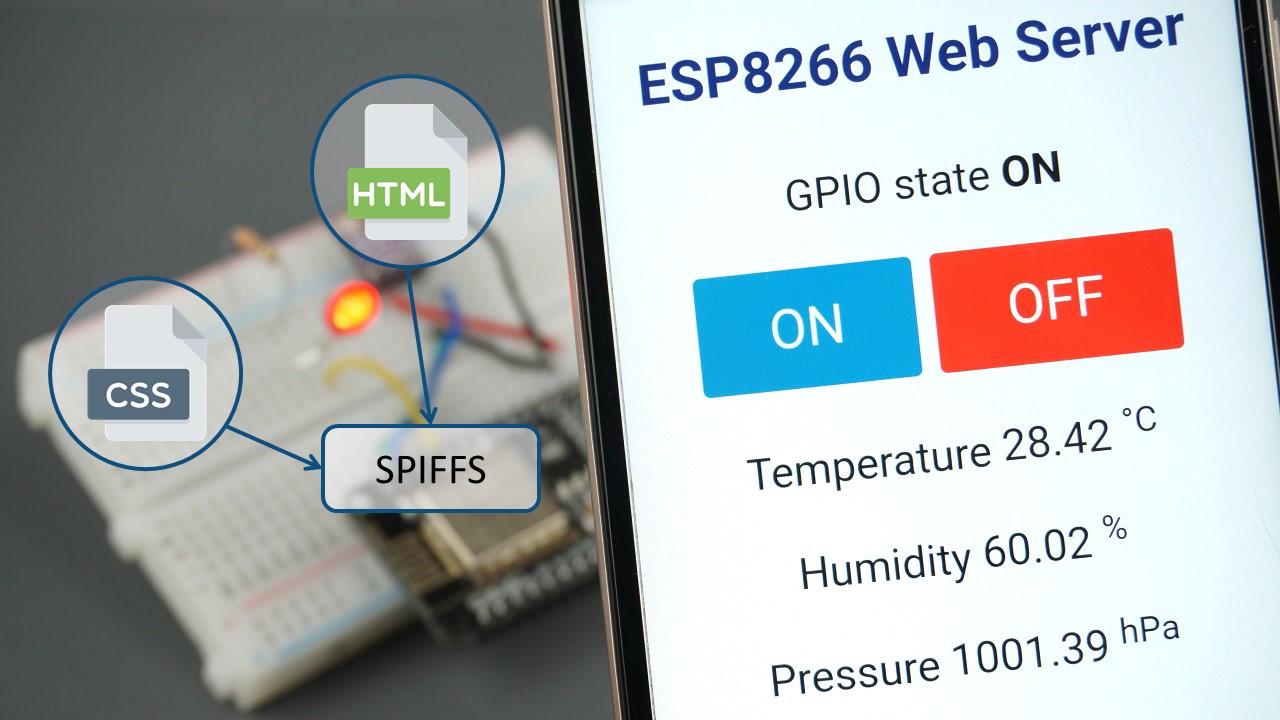
To show how the tool works, we will create a web server with a styled page and an image. Then when accessing the webserver, the browser will receive the HTML file, the CSS file, and the images. Create Webserver with ESP8266 using SPIFFS. For that, we will need two things: Library to manage SPIFFS. Tool to load the files in FLASH.

Build an ESP8266 Web Server Code and Schematics Random Nerd Tutorials
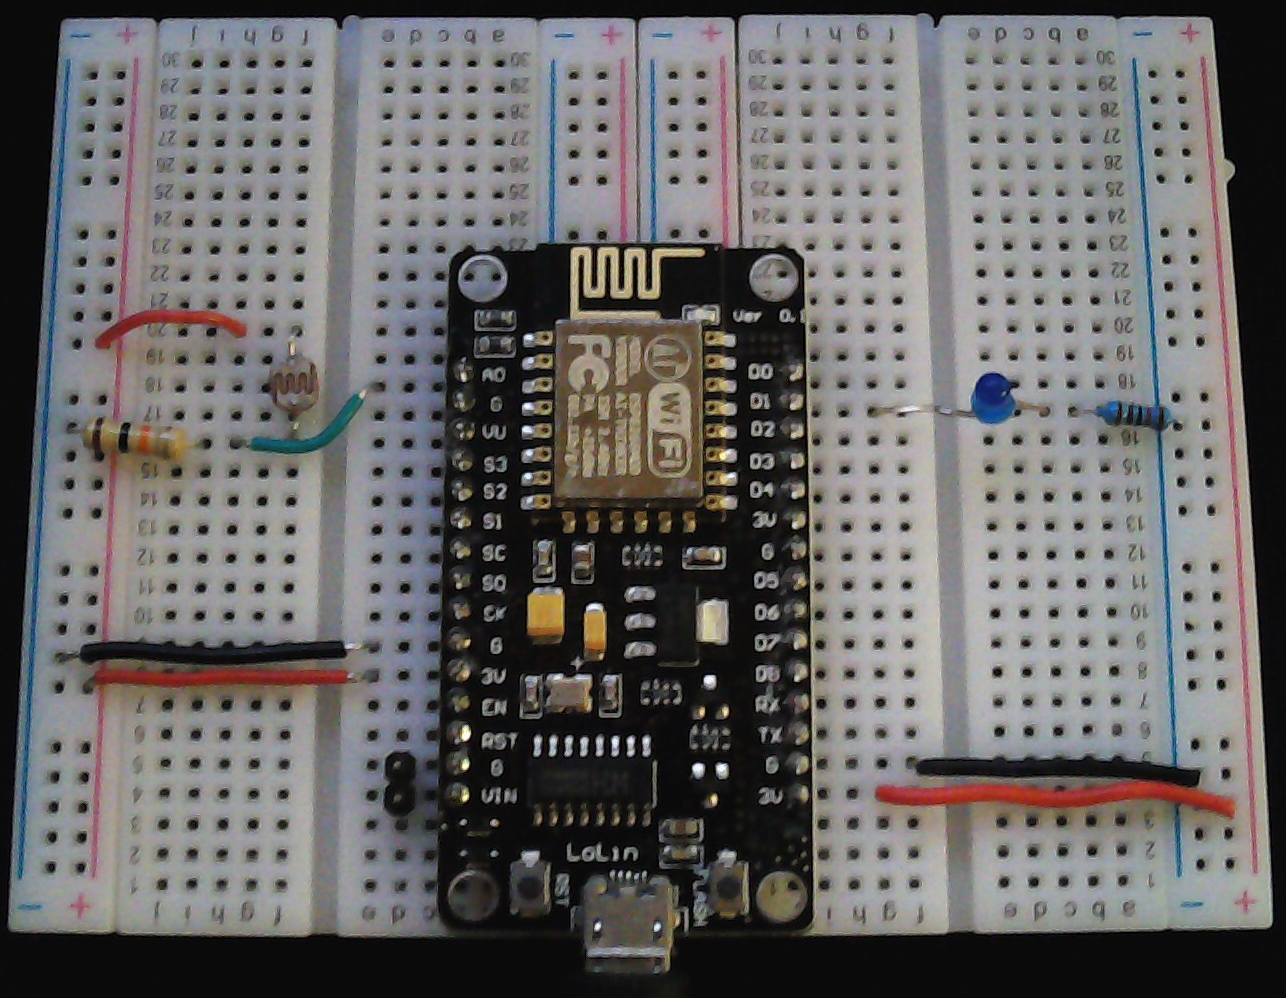
Step 1: Components This project requires just a few components: 1x ESP8266 ( eBay link) 1x FTDI Programmer ( eBay link) 2x LEDs 2x Resistors 1x Breadboard Some jumper wires Ask Question Comment Download Step 2: Flashing NodeMCU For this project your need to flash your ESP8266 with NodeMCU.

ESP8266 Web Server (Without Arduino) Hackster.io
ESP8266 NodeMCU Async Web Server - Control Outputs with Arduino IDE (ESPAsyncWebServer library) In this tutorial you'll learn how to build an asynchronous web server with the ESP8266 NodeMCU board to control its outputs. The board will be programmed using Arduino IDE, and we'll use the ESPAsyncWebServer library.

Create Simple ESP8266 NodeMCU Web server in Arduino IDE
1. Install ESP8266 Board in Arduino IDE We'll program the ESP8266 using Arduino IDE, so you must have the ESP8266 add-on installed. Follow the next tutorial to install it: Install ESP8266 Board in Arduino IDE (Windows, Mac OS X, Linux) 2. Filesystem Uploader Plugin
ESP8266 Based Wireless Web Server Arduino Projects
one LED BME280 or BMP280 sensor a little knowledge about HTML Implementing an ESP8266 Web server Firstly, it is necessary to implement the Web server on ESP8266. The code is shown below:
ESP8266 example WiFi Access point, static IP, webserver and remote
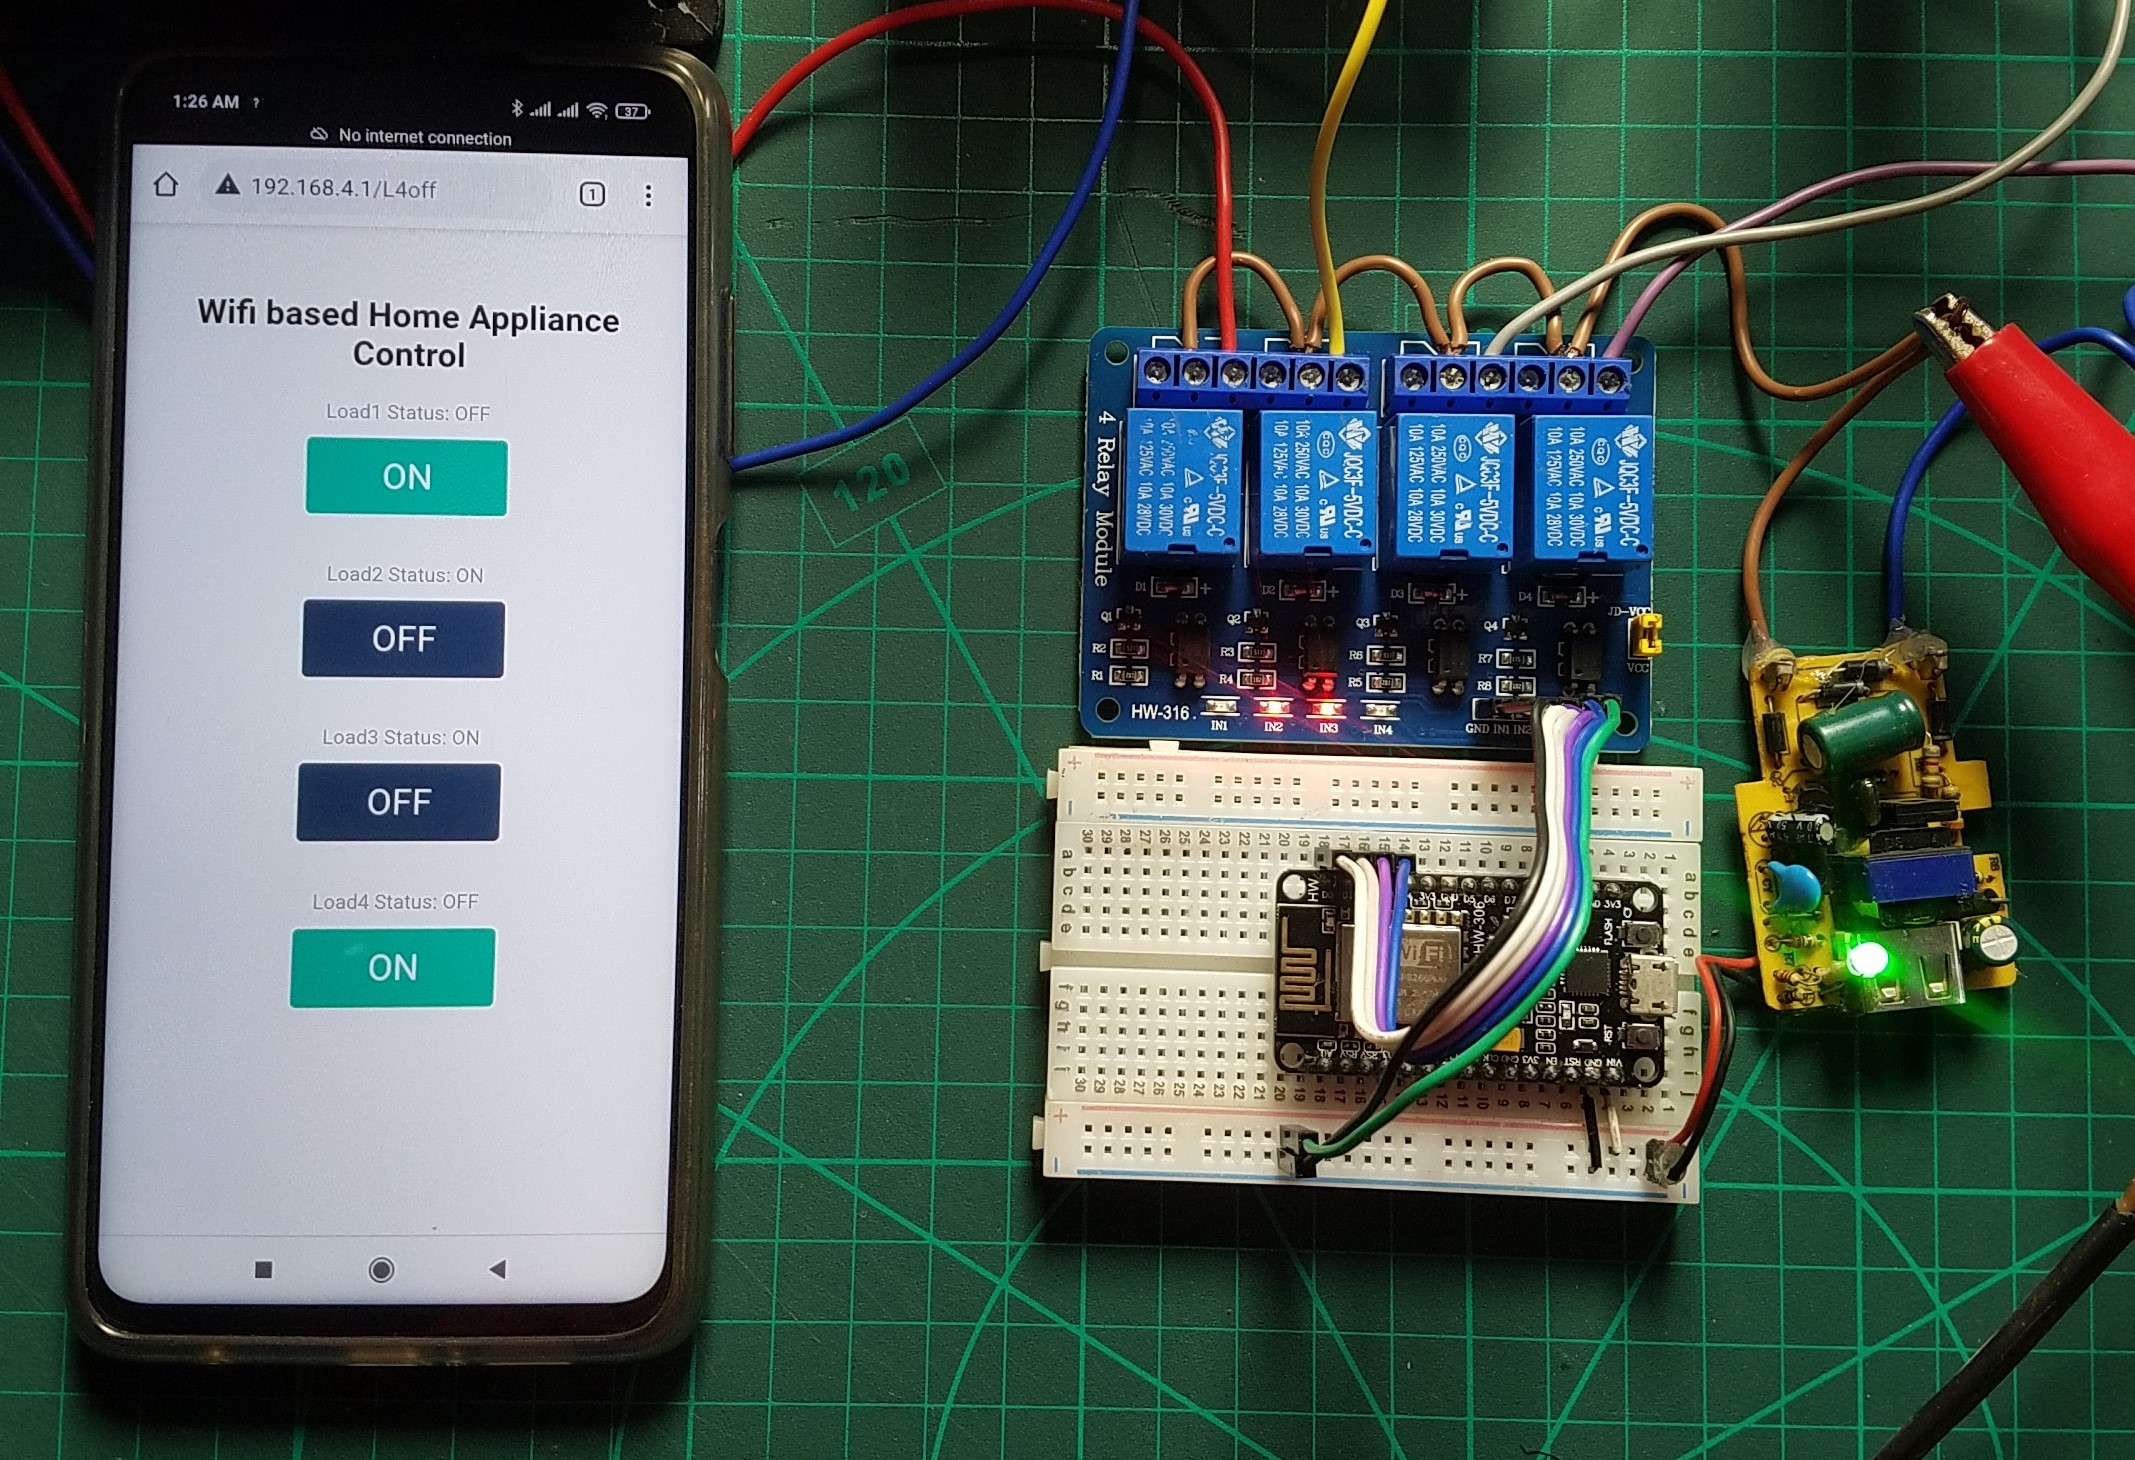
ESP8266 Web Server for Controlling Electrical Devices In this tutorial, using the ESP8266 board, we intend to control electrical devices simultaneously with the help of relay modules, so that by setting up a web server with Internet. We can control the relays and communicate with the board.

ESP8266 Web Server Application Home Automation System Esp8266 Wifi
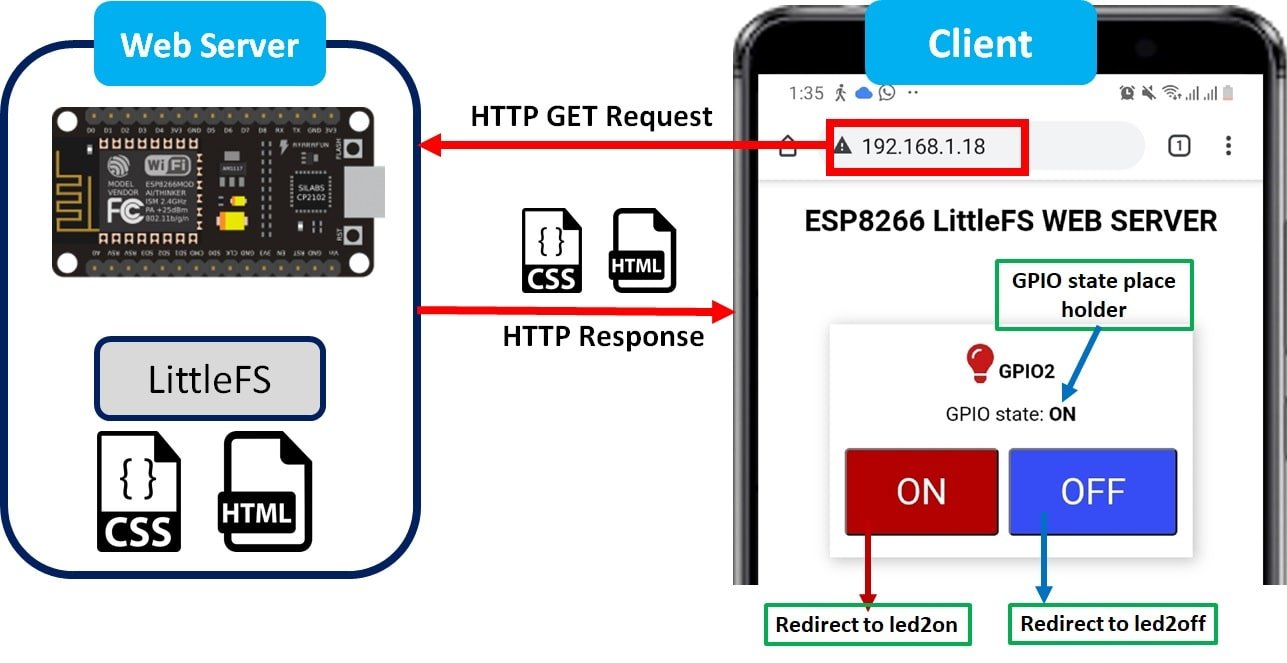
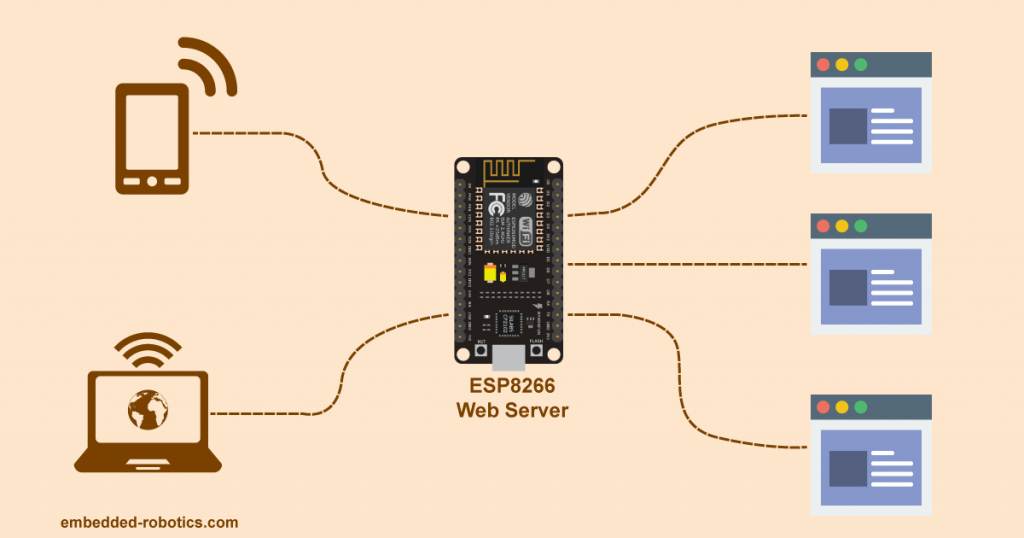
This ESP8266 NodeMCU standalone Web Server can be accessed by any device in the local network that has a web browser (Mobiles, Laptops, Tablets). To demonstrate the working of the web server is ESP8266, we will create a web page which controls two LEDs. Outline What is a Web Server?

ESP8266 Make Your Own LED Control Web Server in Arduino IDE Robotica DIY
One of the most useful features of the ESP8266 is its ability to not only connect to an existing WiFi network and act as a Web Server, but also to create its own network, allowing other devices to connect directly to it and access web pages.

ESP8266 Web Server with Arduino IDE Random Nerd Tutorials
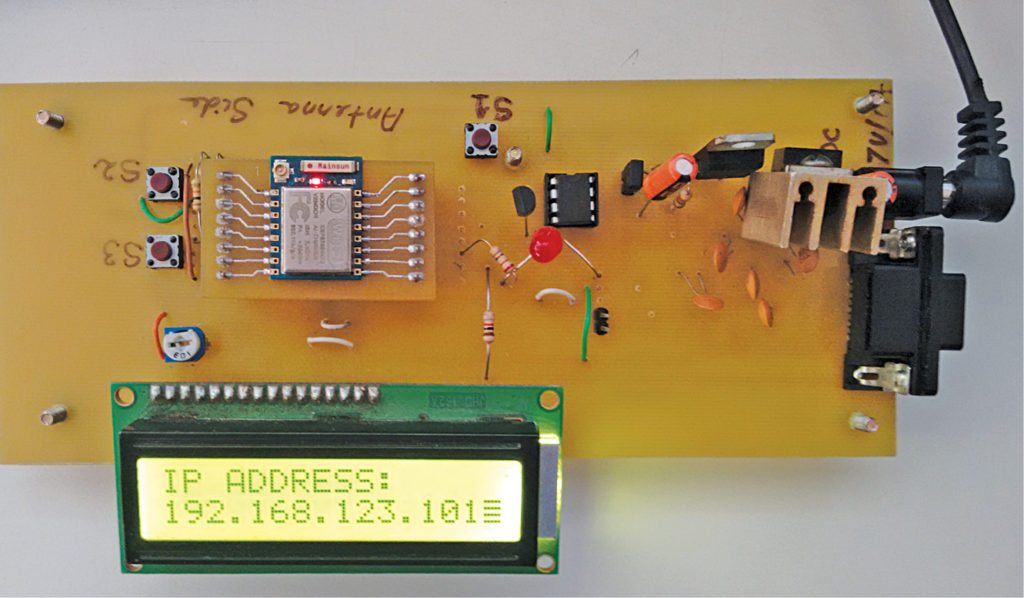
ESP8266 connects to WiFi Network and we get web page in our phone and PC which is connected to same WiFi network. In previous tutorial we have seen how to make ESP8266 as Access point and web server.

ESP32/ESP8266 Control Outputs with Web Server and a Physical Button
Step 1: Introduction Description: ESP8266 is a highly integrated chip designed for the needs of a new connected world. It offers a complete and self-contained Wi-Fi networking solution, allowing it to either host the application or to offload all Wi-Fi networking functions from another application processor.

ESP8266 Web Server using SPIFFS with Arduino IDE (NodeMCU) Random
Setting up web a server on ESP8266 requires very little code and is surprisingly straightforward. This is thanks to functionality provided by the versatile ESP8266WiFi library. The purpose of this example will be to prepare a web page that can be opened in a web browser. This page should show the current raw reading of ESP's analog input pin.
ESP8266 as Web Server using WiFi Access Point Hackster.io
This ESP8266 Web Server is mobile responsive and it can be accessed with any device that as a browser in your local network. For a more in-depth tutorial on how to create a web server, and explanation of the code, read this post ESP8266 Web Server Step-by-step
ESP8266 Web Server using SPIFFS with Arduino IDE (NodeMCU) Random
145 commits examples Chunked encoding (#2199) 8 years ago src ESP8266WebServer: add application/json content type 7 years ago keywords.txt Expose request handlers in ESP8266WebServer 9 years ago library.properties Move esp8266 platform from "arduino" into "esp8266com"

Microcontroller Projects Arduino + ESP8266 WiFi Web Server
Once you are connected to the NodeMCU AP network, open a web browser and enter the address 192.168.1.1. The ESP8266 will respond by displaying a web page that shows the current status of the LEDs and buttons. You can also monitor the serial monitor to check the status of the ESP8266's GPIO pins.

Build ESP8266 Web Server For Relay Control By Http String In LAN
Here a little tutorial to learn how to manage a complete web server via esp8266 esp32 or other arduino like device. Now we want protect our site with a security system, by default REALM is available, but a token authentication give te possibility to create a custom login page.
How To Configure ESP8266 Web Server In STA And AP Mode
This ESP8266 NodeMCU Web Server is mobile responsive and it can be accessed with any device with a browser in your local network. If you want to learn more about the ESP8266 module, first read my Getting Started Guide for the ESP8266 WiFi Module . This tutorial covers two different methods to build the web server:
